Sunday, 28 September 2014

Online Card Classes - Copics for Cardmakers - Days 1 to 5

Hi there!

I have signed up to Copics for Cardmakers, but was unable to start lessons until yesterday. Firstly, I was away for work this week. Secondly, I only owned about three colours and needed just a few more to practise with! Luckily for me, my order arrived in the mail yesterday morning. :-)

I am sharing my progress here, but please note, I am an absolute beginner. These are my very first Copic lessons. It is highly unlikely that anyone will learn anything from me, but hopefully in a few months, we can look back and see some progress, lol!

Second disclaimer - unusually for me, neatness has not been a priority. I'll tidy up how I work once I've learned some of the techniques. You'll see lots of outside-the-line colouring here.

Day 1 - Blending Basics
We started with two colour and three colour blending on balloons. I forgot to practice three colour blending because I was most interested in learning how to blend two colours (to stretch my limited stash). We were taught how to create light using the Blender, but I didnt' practice it this time. On the second balloons, those highlights were just created by leaving the first colour alone in that spot (not going over them again).
I forgot to add the red and green colours onto this next one. They were R29, R24, R22, and YG23, YG95.
Day 2 - Blending Tricks
On Day 2 we learn about tip-to-tip blending, acetate blending, and feathering. All very cool techniques that I didn't even know existed, except perhaps the feathering, but the lesson taught me more than I knew, for sure!

The little red-breast was made using tip-to-tip AND acetate blending. The little grey bird was just an experiment on my own to see how he would look in grey.
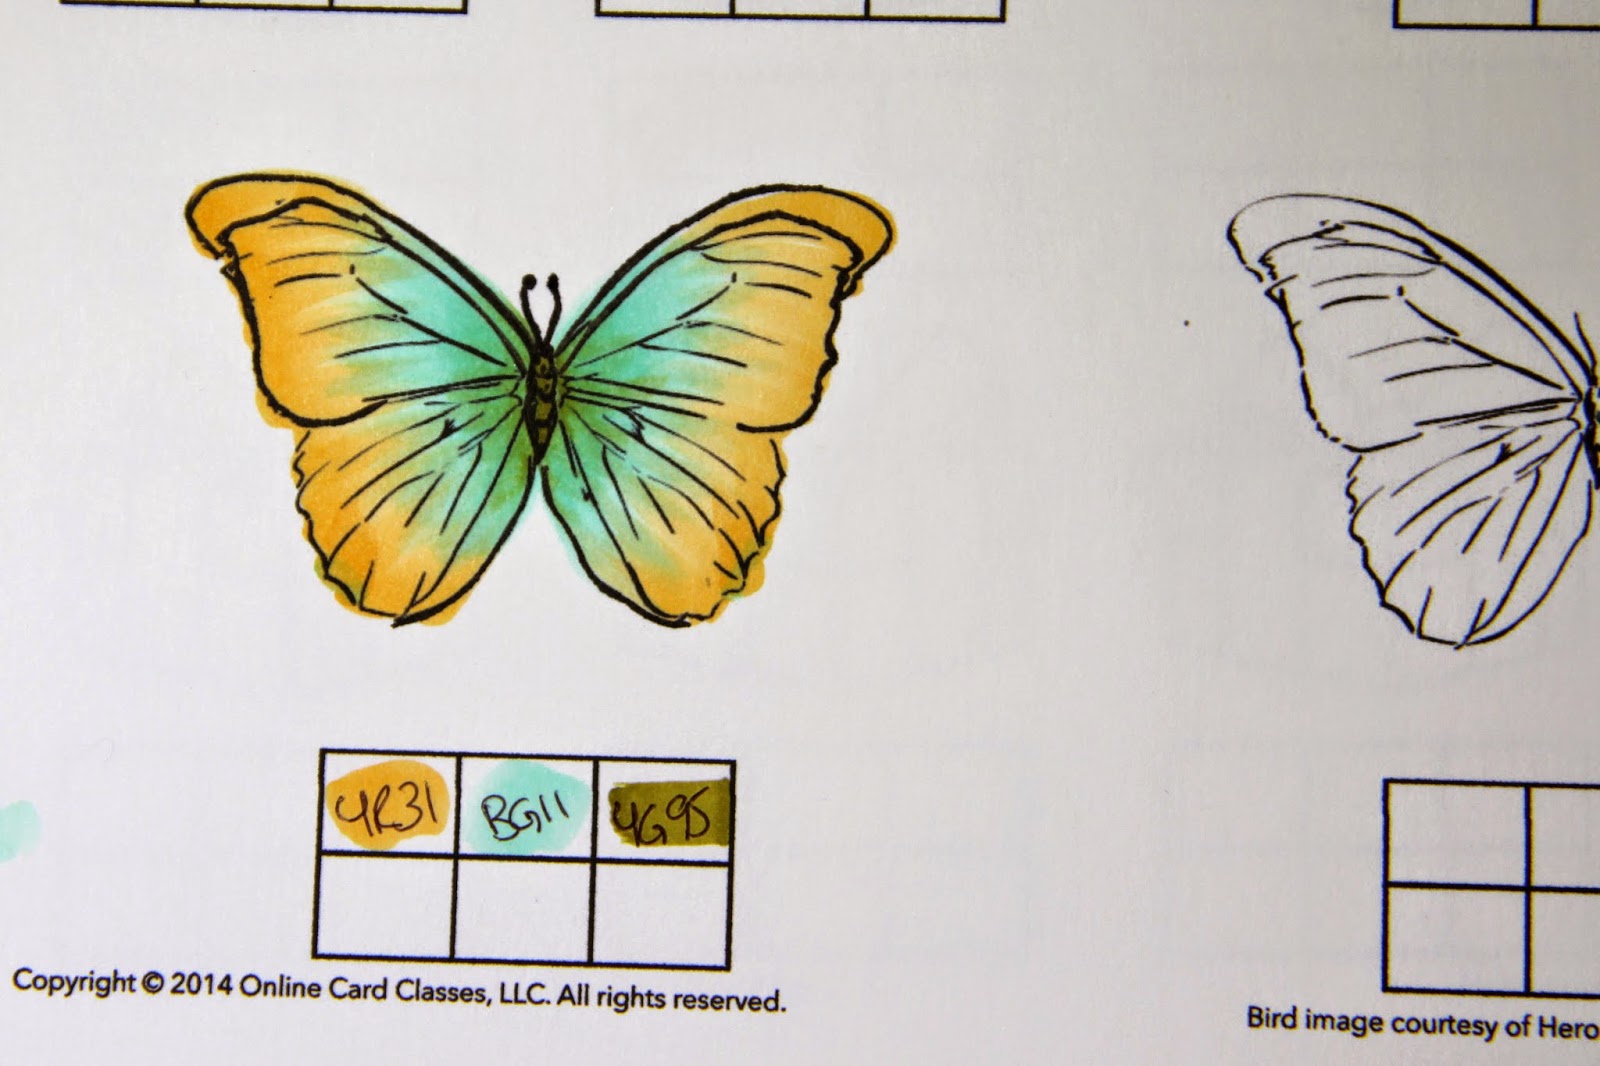
Next came butterflies.
 On the second butterfly I used feathering and tip to tip blending. I also added black outlines.
Day 3 - Get More Mileage out of Your Markers
I found the blending with grey lessons fascinating! Some of my results were a bit dodgy, but even those "not so great" results taught me things! The use of grey may be one of the best things I take away from this online class. That I need to buy more grey markers may be the accompanying lesson (I have three greys, T1, T4, and T6, that's it).
The umbrellas practice taught me all sorts of things that I should NOT do... and a few that I should.
Day 4 - Turning on the Lights
Day 4 was all about shading. My favourite lesson was where I learned how to imagine sections of images as either round, oval, square, etc and to imagine where the shadows would fall, depending on the light source direction. My favourite revelation was that it's okay to shade any way you choose to. :-)

The first flower has directional light. The second used the feathering technique on the flowers with more realistic leaves. The third flower I didn't like much (too dark), so I decided to experiment with the leaf colour, which was an interesting process.
Day 5 - Colouring skin, hair, and clothing
I will admit that I never thought I would learn how to colour skin and hair. It looks so tricky. I now think that with a little practice that I WILL learn this skill. Yay! I don't have many skin/hair colours, but I don't imagine I'll do much colouring of people, so for the moment my few colours will suffice.
When I was working on my first ballerina last night, my little real-life ballerina came over and exclaimed "You're colouring me!". She was right. I was colouring my ballerina to look like my little girl. :-)  She then put in an order for a ballerina in an aqua tutu, which I made this morning.
The aqua ballerina pleased my daughter and the order for my next ballerina is a red dress. Maybe I WILL be colouring more people... lol!

So that wraps up the first five days of lessons. I hope that next week I will be able to play along within a day or two of the lesson. I'm really enjoying this class and I'm so glad that I signed up. If you have been thinking of joining in, it's worth it! I managed to catch up on the first five days over the course of a day, so you certainly have time to join in and catch up with the rest of us. :-)

See you later!

Michelle
xxx


Friday, 26 September 2014

CAS(E) This Sketch 94 - Hello!

Hello!

I may have wandered off on another tangent this week. For some reason I struggled with this sketch. This card is my fourth version. I finally decided on this sentiment because the h and the l's reflected those background lines in the sketch for me. My original cards were very graphic, and they just weren't working, so this time I used the lovely big hello and a bunch of flowers. I'm much happier!
I used PTI Wonderful Words: Hello, and wPlus9 Fresh Cut Containers stamps.
I really love this sketch, even though it challenged me (probably BECAUSE it challenged me). I can't wait to see how everyone else creates with this inspiration!

Thanks for coming by to visit me!

Michelle
xxx

Thursday, 25 September 2014

Fusion - Sunflower

Hello!

Sunflowers! I cannot wait to see the gallery for Fusion Challenge this time around! The inspiration and the sketch work well together, and that inspiration... wow!

This is what I came up with. I tried out some colouring. I'm pretty pleased with how it turned out.
I used PTI Botanical Blocks stamps. Markers are SU! Blendabilities in Daffodil Delight, Night of Navy, and Old Olive.
Thanks for coming by to visit!

Michelle
xxx

CASE Study 210 - Christmas berries

Hello!

It's the last Thursday of the month which means it is our last week with Debby Hughes as muse at CASE Study. I've loved CASEing Debby this month! Most of the month I stayed pretty close to Debby's inspiration, but today's card took a flight of fancy all by itself, lol! I can see the love hearts and the "happily ever after" on the inspiration card, but all my brain was seeing was Christmas berries. :-)
This is Debby's gorgeous inspiration card.
Thanks for coming by to visit! I can't wait to see how everyone is inspired this week!

Michelle
xxx

Friday, 19 September 2014

The Cutting Edge 10

Hello!

The Cutting Edge challenge this time has a most remarkable die-cut scene on the inspiration card. I looked at that card and thought there was NO WAY that I would be able to create a card to enter, it was just a little too much of a challenge for me, lol! My dies don't tend to be things I can create into a scene. They are generally shapes, or the outlines of stamps that I own. There are a couple of silhouette dies I have on my wishlist, but they haven't come home yet.

Anyway, after thinking about it a little longer, I thought I had found a solution. I could use the same form of block colouring without any stamping (except sentiment). I used PTI Mighty Oak die and the "grass" at the bottom is a MFT die. I hand cut a couple of little birds, based on the shape of a bird stamp I own from PTI Birds & Blooms. The only stamping is the sentiment, just like the inspiration.
Nowhere near as gorgeous as the inspiration, but closer than I thought I could get! Don't you just love that dog die? I think I would frame this dog and bird card if I received it!
Before I go, I thought I'd share a photo with you. Spring school holidays have begun. I took a couple of days off work to let the kids just laze around at home for the start of holidays (the rest of the time they go to vacation care, where they are busy, busy, BUSY all day long). My little girl had collected all of her dog toys (plus a jaguar, because there weren't enough dogs for the party, apparently) and put together a picnic of dried apricots, strawberries, and raisin toast. She called it her "puppy dogs' picnic" (like "teddy bears' picnic"). Our real-life dog, Coco, decided to join in and guard the food from the chickens. When I looked over the back balcony, this is what I saw.
Thanks for visiting!

Michelle
xxx

CAS(E) This Sketch 93 - Smile!

Hello!

You know how sometimes you sit down with one idea in your head and the card that appears in front of you has absolutely no relationship to that original idea? Yeah, well that happened with this card, lol! The sketch for CAS(E) This Sketch this week has a diagonal square. I quite like that square. I don't know how it got so lost in the translation... I'll just blame it on my brand new Fresh Cut Containers stamps from Wplus9. I got carried away with creating my little pot of plants and completely forgot what I was doing! The sentiment is wPlus9 Strictly Sentiments 5.
And this is the fabulous sketch.
I am also joining in with Darnell's NBUS Challenge #2 with this card. I'll link it up in the morning. ;-)
Today is my wedding anniversary. My hubby and I have been married 15 years. :-)  We have been together for 21 years. It doesn't feel that long. I still think he's pretty cute. In fact, I think he's cuter now than when we first met. ;-) He's also the best hubby in the entire universe. I can't wait to see him later on today when he returns from his week of work travel. I might make a special dinner. I might make a card, too! ;-)

Thanks for visiting!

Michelle
xxx

Thursday, 18 September 2014

CASE Study 209 - dreamy feathers

Hello!

Oops! I'm running a little late! The day got away with me. I have a day off work for the first day of school holidays (parent-teacher interviews at school, buying new Summer uniforms for next term, shopping for family presents) and I thought I would have PLENTY of time to whip up a post for CASE Study. It turns out that I got home, lay down on my bed with my book and didn't come up for air until that book was finished. You know how it is when you only have a couple of chapters left... lol!

So here is my card!
Our muse is Debby Hughes, who is awesome, and inspires me all the time. I loved Debby's colour scheme and the wreath and feathers! I white embossed Waltzingmouse Stamps Fine Feathers on Fine Linen card, added a few sequins, and mounted on white card base.
Please forgive me being so tardy! And thanks for visiting!

Michelle
xxx